

How to Use Your CPAP Machine and Set It Up Safely
Struggling with relentless brain fog, 3 AM awakenings, and the heavy toll of non-restorative sleep? CPAP therapy can restore your vitality, but learning how to use cpap machine setups correctly is vital. By combining clinical CPAP guidance with seamless, screen-free tracking like the subscription-free Herz P1 Smart Ring, you can measure real recovery and reclaim your life.
Take Back Your Sleep.
Take Back Your Life.
- Fall asleep faster & sleep deeper
- Stop waking up in the middle of the night
- Wake up refreshed & full of energy
Key Article Highlights
- Step-by-Step Clinical Blueprint: Master how to safely set up and configure your CPAP machine.
- Overcoming the Setup Friction: Practical techniques to solve common issues like mask leaks, dry mouth, and sensory discomfort.
- Validation Through Biometrics: Discover how monitoring Heart Rate Variability (HRV) and Sleep Stages helps evaluate therapy success.
- The Screen-Free Tracking Edge: How lightweight, subscription-free devices like the Herz P1 Smart Ring optimize sleep parameters.
Understanding Your CPAP Setup: Essential Prerequisites
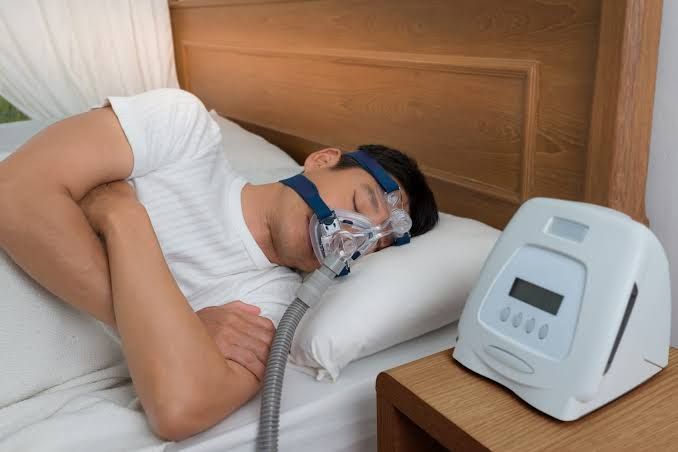
For many, the diagnosis of obstructive sleep apnea (OSA) brings a mixture of relief and anxiety. You finally have a scientific explanation for your daily cognitive fatigue, your morning headaches, and those frustrating 3 AM awakenings with a racing mind. Yet, staring at a new medical device on your nightstand can feel deeply overwhelming. Understanding mastering how to use cpap machine systems safely is the first major step to transitioning from chronic, non-restorative sleep to deep physical restoration.
Continuous Positive Airway Pressure (CPAP) acts as a pneumatic splint for your airway. When you sleep, the muscles in your throat relax. For those with sleep apnea, this relaxation leads to a collapsed airway, cutting off critical oxygen to the brain and triggering immediate micro-arousals. While you might not fully remember these brief awakenings, they shatter your sleep architecture, keeping you trapped in light, fragmented cycles and depriving you of vital deep sleep and REM phases.
Before plugging in your device, let’s explore the structural anatomy of your CPAP therapy setup. Familiarity with these key components removes the intimidation factor and lays a solid foundation for your long-term wellness routine:
- The CPAP Base Unit: The motor assembly that draws in room air, filters it, and pressurizes it to your prescribed therapy setting.
- The Humidifier Chamber: An integrated water reservoir designed to add moisture to the pressurized air stream, protecting your nasal passages from severe dryness and irritation.
- The Delivery Tubing: Standard or heated hoses that transport the pressurized air from the machine directly to your mask.
- The CPAP Mask: Available in three primary designs: Nasal Pillows (minimalist inserts), Nasal Masks (covering the nose), and Full-Face Masks (covering both nose and mouth).
- The Air Filters: Disposable or reusable screens that block environmental dust, pet dander, and airborne allergens from entering your lungs.
A primary hurdle in CPAP therapy is consistency. Many patients abandon their machines within the first thirty days because the mask feels claustrophobic, the air feels too dry, or they find standard, bulky smartwatches too uncomfortable to track sleep while adjusting to the CPAP hose. To address this tracking issue, a screen-free, ultra-lightweight titanium tracking ring offers a wonderful alternative. By using a subscription-free Herz P1 Smart Ring, you can monitor your Sleep Stages and autonomic recovery without adding extra bulk or screen glare to your wind-down ritual.
Before you begin the physical assembly, ensure your sleep environment is prepared. Find a level, stable surface near your bed that sits lower than your head. Placing the CPAP machine below your sleeping position helps prevent condensation (commonly called “rainout”) from flowing down the tubing and dripping into your mask during the night. Once your nightstand space is cleared and wiped down, you are ready to learn exactly how to use cpap machine setups safely.
How to Set Up a CPAP Machine for Success: Step-by-Step Execution

The core process of sleep optimization begins with technical precision. Setting up your therapy gear correctly is highly critical for both your physical safety and the therapeutic effectiveness of the machine. Let us walk through a rigorous, clinically sound step-by-step guide on how to set up a cpap machine properly.
Step 1: Positioning and Power Connection
Place your CPAP base unit on your prepared, level nightstand. Ensure that the unit’s air intake vents are totally unobstructed by bedsheets, curtains, or nearby walls. Plug the power cord firmly into the rear or side of the CPAP machine, then connect the three-prong plug directly to a wall outlet or high-quality surge protector. Avoid utilizing ungrounded extension cords to eliminate any potential electrical hazard.
Step 2: Managing the Humidifier Chamber
To prevent mineral buildup and bacterial growth within your machine, always use distilled water in your humidifier. Slide the water chamber out of the CPAP base unit. Open the reservoir lid and fill it with distilled water up to, but never exceeding, the designated “Max” fill line. Wipe the outside of the dry chamber with a clean cloth, then slide it back into the base unit until you hear a secure click. If you are learning troubleshooting how to use a cpap machine without humidity, you can run the device dry, but this is highly discouraged due to mucosal drying.
Step 3: Connecting the Delivery Tubing
Take your flexible air hose and connect one end to the pressurized air outlet port on your CPAP machine. If your machine features a heated tube option, make sure the copper electrical pins on the hose collar align precisely with the port receiver before pushing it home. Connect the opposite end of the hose to the swivel joint on your mask frame.
Step 4: Fitting Your CPAP Mask
Understanding how to use a cpap machine effectively hinges almost entirely on how you adjust your mask. Follow this routine to ensure a perfect, comfortable seal:
- Sit comfortably on the edge of your bed, holding the mask gently over your nose or face.
- Pull the headgear straps smoothly over your head, ensuring the rear straps rest flat against the back of your skull.
- Connect any magnetic clips or plastic buckles on the lower straps.
- Lie down in your preferred sleeping posture. Your facial muscles shift when lying down, meaning adjustments made while standing will feel different when you rest.
- Slowly adjust the upper and lower headgear straps in tandem. They should feel secure but not tight enough to leave red indentations or pinch your skin.
Step 5: Activating and Adjusting the Machine
Press the physical Power button on your CPAP machine, or rely on the “Auto-Start” feature by simply breathing naturally into your mask. As the pressurized air starts flowing, pay close attention to any high-pitched whistling sounds. This whistling indicates air leaks around the edges of your mask cushion. To fix this, gently pull the mask cushion slightly away from your face to let it auto-inflate, then let it settle back onto your skin.
If the therapy pressure feels difficult to exhale against, look for your machine’s “Ramp” setting. This safety feature lowers the start pressure, slowly ramping up to your prescribed therapeutic level over 5 to 45 minutes, allowing you to drift off to sleep comfortably. For patients prescribed higher pressures, your clinical team may configure a BiPAP machine instead. This device dynamically shifts pressure between inhalation (IPAP) and exhalation (EPAP) to make your breathing feel completely natural.
Biometric Validation: Understanding Your Sleep Metrics
How do you know if your CPAP therapy is actually working? While CPAP apps show device usage and leak rates, they cannot measure your body’s physiological response. By tracking your sleep architecture with the Herz P1 Smart Ring, you can watch your real recovery. As sleep apnea is brought under control, you should see a healthy rise in your Deep Sleep and REM sleep stages, alongside a gradual increase in your nocturnal Heart Rate Variability (HRV)—proving that your autonomic nervous system is shifting out of fight-or-flight and into profound rest.
By learning how do you use a cpap machine safely, you are giving your cardiovascular system a massive break. Eliminating obstructive pauses stops dangerous blood pressure spikes, relieves stress on your heart, and ends the constant flow of cortisol that leaves you feeling exhausted every morning.
Common Pitfalls, Safety Protocols, and Tracking Recovery
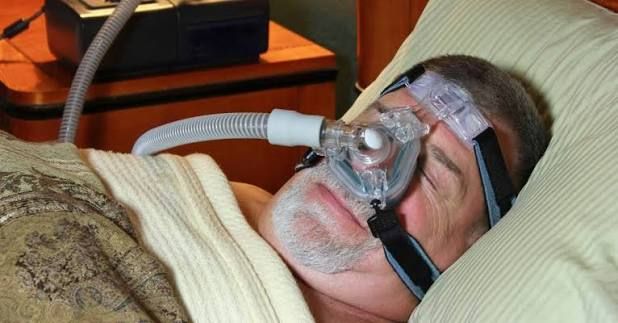
Even with structured guidelines, adjusting to sleeping with a CPAP machine takes time. Recognizing the main issues that arise during your first few weeks of therapy allows you to troubleshoot them quickly and maintain your progress.
One of the most frequent complaints when learning correct guidelines on how to use cpap machine therapy is dry throat or nasal passages. This is usually caused by setting your humidifier too low or experiencing mask leaks that allow air to bypass your airways. If you wake up with a parched mouth, increase your humidifier’s setting. If your nasal passage feels raw or irritated, a saline nasal spray used before bed can provide immediate comfort.
Another major challenge is “rainout,” which occurs when warm, humidified air cools down as it travels through your tubing, turning into water droplets that splash onto your face. To prevent this, try using a heated tube, wrap your standard tube in a fabric sleeve, or raise your room temperature slightly. Keeping your CPAP machine physically lower than your mattress is another simple way to let gravity drain any moisture back into the water chamber.
Hygiene is also crucial. Because a CPAP machine circulates humid air directly into your respiratory tract, failing to clean it regularly can turn your machine into a breeding ground for bacteria and mold. Establish a simple cleaning routine:
- Daily: Empty any leftover distilled water from the humidifier chamber and let it air-dry. Wash your mask cushion with warm, soapy water (using mild, unscented soap) to remove any facial oils.
- Weekly: Soak your breathing tube, humidifier chamber, and mask headgear in a basin of warm water with mild dish soap. Rinse all parts thoroughly and hang them up to dry away from direct sunlight.
- Monthly: Inspect your CPAP air filters. Replace disposable paper filters when they begin to look gray, and wash any reusable foam filters under running water.
Say Goodbye to Bulk with Screen-Free Sleep Tracking
Using a CPAP machine requires adjusting to wearing a mask and managing a flexible hose. The last thing you need is a bulky, bright smartwatch on your wrist that constantly buzzes and demands daily charging. The Herz P1 Smart Ring offers an elegant, screen-free alternative. Made of aerospace-grade titanium, it sits comfortably on your finger, collecting precise biometrics (Sleep Stages, HRV, Resting Heart Rate) without any screen glare or subscription fees. See exactly how your CPAP therapy is boosting your sleep quality, naturally.
Many patients wonder, “How do I know if my CPAP settings are right?” If you are looking into tips for how to set up a cpap machine, look at your clinical data. Most modern machines monitor your apnea-hypopnea index (AHI) in real-time. If your AHI is consistently below 5, your therapy is working effectively. However, tracking your body’s response with a biometric tool like a smart ring adds a helpful second layer of confirmation. When your heart rate drops comfortably during sleep and your recovery score improves, you know your cardiovascular system is recovering well.
Always collaborate closely with your sleep specialist. Never adjust your machine’s pressure settings on your own; doing so can lead to central sleep apneas, where your brain temporarily forgets to signal your body to breathe. Stick to clinical protocols, practice regular maintenance, and use comfortable biometric tracking to stay on top of your progress.
To help you establish your routine, here is a quick, daily checklist to keep next to your bed as you master the fundamentals of how to use a cpap machine correctly:
Daily CPAP Setup Checklist
- Fill the humidifier chamber with fresh distilled water to the fill line.
- Inspect the tube connection to ensure it is secure at both ends.
- Gently wipe down your silicone mask cushion to remove any skin oils.
- Put on your mask and adjust the straps for a snug, leak-free seal.
- Turn on the machine (or use auto-start) and activate the ramp setting if needed.
- Put on your Herz P1 Smart Ring to begin tracking your physical recovery.
In conclusion, getting used to your CPAP therapy is a journey of small, consistent steps. By carefully applying these detailed instructions for how to use cpap machine setups, you are taking proactive charge of your long-term health, protecting your heart, and reclaiming your physical and mental energy. Sleep well, track your progress wisely, and enjoy waking up refreshed.
