

How to Fix a Hole in an Air Mattress Step by Step for Restorative Sleep
Waking up flat on the cold floor at 3 AM is the ultimate sleep disruptor. If a leaky airbed is ruining your night, learning how to fix a hole in an air mattress is the first step to reclaiming your rest. Once the physical leak is patched, we can focus on monitoring your actual sleep recovery with the screen-free Herz P1 Smart Ring.
Take Back Your Sleep.
Take Back Your Life.
- Fall asleep faster & sleep deeper
- Stop waking up in the middle of the night
- Wake up refreshed & full of energy
- Locating Elusive Micro-Leaks: How to spot the exact source of a deflating bed using simple household soapy water.
- Step-by-Step Vinyl Airbed Repair: Clean, sand, and patch techniques that guarantee a permanent, lifetime seal.
- Understanding Sleep “Leaks”: How small overnight disruptions trigger micro-arousals and suppress cardiovascular recovery.
- Screen-Free Biometric Tracking: Transitioning away from bulky smartwatches to optimize your HRV and sleep stages naturally.
Step-by-Step Guide: How to Fix a Hole in an Air Mattress
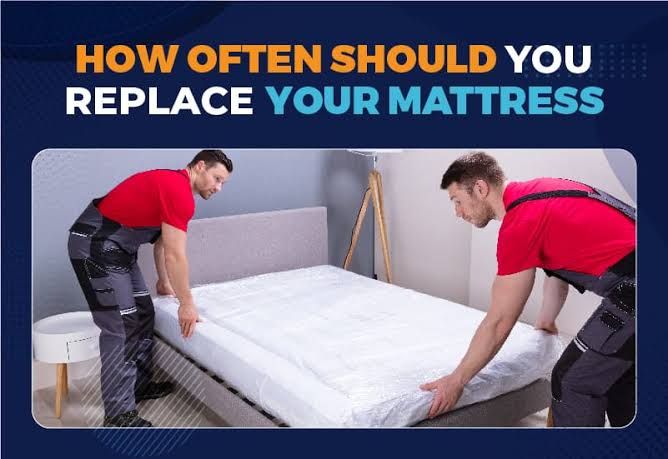
When you are sleeping on an inflatable mattress, there is nothing worse than waking up at 3 AM with your hips resting against the hard floor. The gradual loss of air ruins your night and leaves you with severe neck stiffness and morning fatigue. Fortunately, learning how to fix a hole in an air mattress is a straightforward process that can save your investment, protect your spinal health, and restore your sleep quality.
Before you run out to buy a completely new mattress, understanding how to perform an airbed repair can keep your temporary bed functioning for years. Let us walk through the exact steps required to locate the leak, prep the surface, and establish a permanent seal.
Prerequisites: What You Will Need
To successfully perform an airbed repair, you will need to gather a few basic household supplies. Having these tools ready ensures that your patch bonds seamlessly with the vinyl material:
- Mild dish soap and warm water: To create a bubbly solution for locating the leak.
- A sponge or spray bottle: To apply the soapy mixture evenly across the surface.
- Fine-grit sandpaper: Essential for removing the soft flocking (velvet coating) if the leak is on the top side.
- Rubbing alcohol: To thoroughly clean and degrease the vinyl before patching.
- An airbed patch kit: Heavy-duty vinyl patches work best, but a bicycle tire patch kit or a flexible polyurethane adhesive (like Tear-Aid) is an excellent alternative.
- A heavy weight: A heavy book or flat object to press down on the patch while it cures.
Step 1: Locate the Leak with the Soapy Water Method
Finding a micro-tear in a large inflatable mattress can be incredibly frustrating. The most reliable way to spot a leak is the soapy water method. First, inflate your mattress to its maximum capacity. Be careful not to over-inflate, as you want to simulate natural sleeping pressure.
Mix a few drops of dish soap into a spray bottle filled with warm water. Spray the soapy solution over the mattress, focusing on the seams, valves, and flat surfaces. Alternatively, wipe a damp, soapy sponge along the surface. Look closely: if there is a puncture, air escaping from the mattress will create a growing cluster of bubbles right over the tear. Once you locate the leak, wipe the soapy water away with a dry towel and mark the exact spot with a felt-tip pen.
Step 2: Prepare the Vinyl Surface
If you want to know how to fix a hole in an air mattress permanently, the preparation step is where most people make mistakes. If the leak is on the soft, flocked surface of the bed, the patch will not stick. You must remove this velvet-like texture first.
Take a piece of fine-grit sandpaper and gently buff away the flocking around your pen mark until you reach the smooth, shiny vinyl underneath. Be careful not to sand too hard, as you do not want to thin the vinyl or create a larger hole. Once the flocking is gone, wipe the area with rubbing alcohol to remove any dust, body oils, or soap residue. Let the area dry completely.
Step 3: Deflate the Mattress Fully
Never attempt to apply a patch while the mattress is inflated. The escaping air will push past the adhesive, creating tiny pathways that will slowly leak air later. Fully open the air valve and press out all remaining air until the mattress is flat.
Step 4: Cut and Apply the Patch
If you are using a standard repair kit, cut a round vinyl patch that extends at least one inch beyond the edges of the tear in all directions. Rounding the corners of your patch is critical—sharp corners catch on blankets and peel off easily over time.
If your patch kit uses a separate adhesive, apply a thin, even layer of glue directly to both the mattress vinyl and the patch. Let the glue sit for about 30 seconds until it becomes tacky, then press the patch firmly onto the mattress. Smooth out any air bubbles from the center outward using your fingers or a flat edge like a credit card.
Step 5: Cure and Test
After applying the patch, place a heavy, flat object (like a stack of heavy textbooks) on top of the repaired area. Let it sit for at least 8 to 12 hours. Allowing the adhesive to cure completely is what differentiates a temporary quick-fix from a permanent repair.
Once cured, inflate the mattress and lie on it to test the seal. If it holds your weight without softening over a few hours, you have successfully mastered how to patch an air bed!
If you are camping and do not have a patch kit, a heavy-duty duct tape or Gorilla tape can act as a temporary fix for your how to fix airbed hole dilemma. However, tape adhesives degrade quickly under body heat, so replace it with a proper vinyl patch once you return home.
Common Pitfalls & Mistakes to Avoid
When learning how to fix a hole in an inflatable mattress, a few common mistakes can ruin your efforts. Avoiding these errors will ensure a long-lasting, reliable stress-free sleep environment:
- Applying the patch to an inflated bed: Always deflate the bed completely so the adhesive can cure flat.
- Neglecting to clean the surface: Oil and dust prevent the adhesive from bonding securely to the vinyl.
- Rushing the drying time: Giving the patch less than 8 hours to cure often leads to immediate failure when you lay down.
- Over-inflating after repair: Keep the mattress slightly soft for the first 24 hours to prevent extreme tension on the new seal.
The Hidden “Sleep Leaks”: How Physical Discomfort Ruins Your Biometrics

When you suffer from sleep disruptions like 3 AM awakenings, we often point to psychological factors like a racing mind or daily stress. But your sleep environment plays an equally vital role. Sleeping on a leaking mattress—even before it deflates completely—acts as a silent physical stressor that slowly drains your vital energy.
If you have struggled to repair blow up bed models in the past, you know how hard it is to sleep comfortably. But what is actually happening to your body when your mattress starts to sag? Let us look at the science of biometric sleep tracking.
The Physiology of Micro-Arousals
As an inflatable mattress loses its pressure, your body is forced to continuously adjust its position to stay balanced. This mechanical shifting triggers what sleep scientists call micro-arousals—brief, subconscious awakenings that pull you out of deep sleep and into light sleep without you realizing it. You might not remember waking up, but your body experiences these events as physical stress.
Micro-arousals disrupt your sleep cycle architecture, dramatically reducing the amount of time you spend in essential sleep stages. When your body is constantly reacting to a changing sleeping surface, it remains in a state of low-grade alert, elevating your heart rate and suppressing your heart rate variability (HRV). The result? You wake up with profound brain fog, physical stiffness, and a general feeling of non-restorative sleep.
Understanding Your Heart Rate Variability (HRV)
Heart Rate Variability, or HRV, is the measurement of the variation in time between each consecutive heartbeat. This metric is controlled by your autonomic nervous system (ANS), which balance your parasympathetic (rest-and-digest) and sympathetic (fight-or-flight) responses.
When you enjoy healthy, deep sleep on a stable surface, your parasympathetic system takes over, resulting in a high, healthy HRV. However, if your body is continuously fighting to align its spine on a deflating mattress, your sympathetic system remains active, causing a drop in your overnight HRV. By tracking your HRV, you can visually see the impact that physical discomfort and environmental changes have on your daily recovery.
Many health-conscious people try to track their sleep quality using traditional smartwatches. However, these devices are often bulky, uncomfortable to wear in bed, and feature bright screens that can light up unexpectedly. This screen exposure can disrupt your circadian rhythm, making it even harder to fall back asleep.
Reclaiming Your Sleep Integrity with Screen-Free Tracking

Fixing the physical leak in your air mattress is only half the battle. Once your bed is stable, the next step is to understand how your body is actually recovering throughout the night. If you want to improve your sleep hygiene without the distractions of blue-light screens, a dedicated, screen-free wearable is the ultimate solution.
This is where the Herz P1 Smart Ring shines. Designed as an elegant, ultra-lightweight titanium wearable, it offers a beautifully simple way to track your recovery, sleep stages, and heart health—entirely free of screens and annoying notifications.
The Screen-Free Tracking Revolution
The Herz P1 Smart Ring features advanced medical-grade biometric sensors that slip onto your finger, providing continuous tracking of your cardiovascular health without the bulk of a smartwatch. By monitoring your sleep patterns on a smooth, secure ring, you can optimize your rest naturally.
Why the Herz P1 Smart Ring Fits Your Lifestyle
If you are tired of dealing with bulky fitness trackers that require daily charging, the Herz P1 Smart Ring offers a breath of fresh air. It is crafted from aerospace-grade titanium, making it so light and comfortable that you will forget you are even wearing it. Here is how it helps you take control of your wellness:
- Subscription-Free Model: Unlike other smart rings on the market that require expensive monthly subscriptions, the Herz P1 is a single-purchase device. You buy it once, and you own your data forever.
- Screen-Free Design: No bright displays or vibration motors to disrupt your evening. It is designed for pure, uninterrupted sleep.
- Detailed Sleep Stage Tracking: The ring monitors your movement, heart rate, and temperature to break down your nights into Light, Deep, and REM sleep phases.
- Intuitive Daily Recovery Score: Instead of forcing you to read complex, hard-to-interpret medical charts, the ring translates your biometrics into a single, actionable daily recovery score so you can plan your day’s intensity.
- Exceptional Battery Life: Enjoy up to 5-7 days of continuous monitoring on a single charge, meaning you can track your sleep all week without worrying about finding a charger.
How to Seamlessly Integrate Wearable Insights
Using screen-free tracking can show you exactly how small changes in your bedroom setup impact your body. For example, you can compare your HRV on nights when you sleep on a fully inflated mattress versus nights spent on a sagging bed. You will likely see a clear correlation: a stable, correctly aligned bed leads to lower resting heart rates, higher overnight HRV, and a significantly higher daily recovery score.
By removing screens from your bedroom and relying on an elegant, comfortable ring, you can build a healthier, more intuitive connection with your body’s natural rhythms.
- Locate the leak using the soapy water bubble test.
- Mark the spot and fully deflate the mattress.
- Sand down any velvet flocking around the hole.
- Clean the surface with rubbing alcohol.
- Apply your patch with a thin layer of adhesive.
- Press down with a heavy weight and let cure for 12 hours.
In conclusion, fixing an airbed leak is a quick, practical skill that can make a dramatic difference in your physical sleep quality. But to truly understand and protect your recovery, look beyond the mattress surface. Embrace a comprehensive approach to health tracking by combining strong sleep hygiene with the screen-free, elegant biometric monitoring of the Herz P1 Smart Ring.
Disclaimer: Results may vary depending on individual physical activity levels, unique health conditions, and daily tracking patterns. The biometric trends and scores provided by the Herz P1 Smart Ring are designed to help you track and understand your general wellness patterns and are not intended to replace professional medical advice, diagnosis, or clinical monitoring. Always consult a healthcare professional regarding any serious sleep or cardiovascular conditions.
